


Night Camera Mode: Video Photo
4.6550.00 Reviews
App Specs
- Version
- 1.2.8
- Updated On
- License
- Free
- Downloads
- 1,000,000+
- Developer
- SABAN
- Categories
- Photography
- Platform
- Android
Screenshots
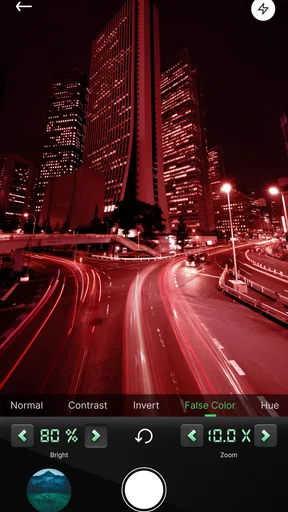
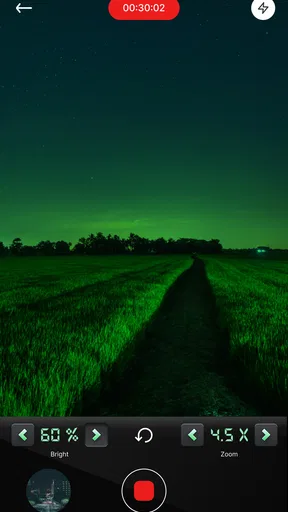
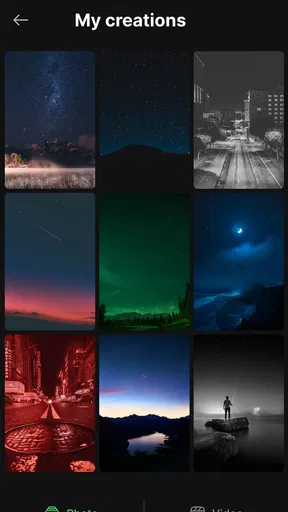
 Analysis by AppCompare
Low-light photography is a small creative challenge with a familiar payoff: a scene that feels vivid in person can turn muddy or grainy in a phone photo. I like having a dedicated camera app to try when the default camera struggles, and Night Camera Mode: Video Photo is built around that specific moment. It is a free photography app from SABAN, rated for Everyone, and its focus is capturing night scenes rather than editing them afterward.
The practical question is not whether an app can make darkness disappear, but whether it gives me a better way to work with the light that is actually there. I found this most useful when I treated it as a tool for deliberate shots: pause, frame the scene, and adjust instead of expecting a moving subject in a nearly black room to come out perfectly. That distinction matters if you are deciding whether it belongs in your regular camera workflow.
Starting with a night scene
Installing Night Camera Mode: Video Photo is a breeze. Available on both Android and iOS, it’s just a quick download away from your app store. Once installed, the app greets you with a sleek interface that's both user-friendly and intuitive. You won’t need a manual to figure this one out; everything is straightforward and clearly labeled.
That direct approach suits the app’s purpose. When I am outside after dark, I would rather spend a few seconds composing a picture than navigate a complicated editing workspace before I have even taken it. The useful starting point is to look for a scene with some existing illumination: a lit shop window, a streetlamp, or a bright sign against a darker background. A night camera can work with those differences in light; it cannot replace light that is not there.
One sensible first test is to photograph the same stationary subject with your phone’s usual camera and then with this app. Keep your position and framing as similar as possible. That makes it easier to judge whether the result is more readable for your purpose, rather than relying on a vague impression that one preview looks brighter. I would compare detail in the shadows as well as the brightest parts, because lifting dark areas can make a bright sign or lamp lose definition.
Features that shape the shot
First things first, let’s talk about the features. The app boasts a range of settings that help you capture clearer, brighter photos even when the lighting is less than ideal. Here are a few highlights that stood out to me:
- Low-Light Enhancement: This is the star of the show. The app adjusts the exposure and brightness levels, allowing for sharper images in dim conditions.
- Video Mode: Not just for photos, this app lets you shoot videos with the same low-light enhancement features. Perfect for capturing those spontaneous nighttime moments.
- Manual Controls: For those who want more control, you can manually adjust ISO, exposure, and focus. It’s like having a mini DSLR in your pocket.
The manual controls are most helpful when the phone is making a poor choice for the scene, not as a reason to adjust everything on every shot. I would start with focus, especially for a still subject close to the camera, and then make small exposure changes while checking whether important highlights remain visible. If you push brightness too far, the picture may look less natural, so I prefer a usable balance over the brightest possible preview.
Worth Reading Before You Choose

EA SPORTS FC Mobile 26 Is a Bigger Football Game, but It Takes Time

Flipboard Shows What News Apps Must Do Beyond the Feed

Switching to Android Auto Means Rethinking Your Driving Routine

Google Calendar Makes a Crowded Week Easier to Manage

Ludo King Makes the Most of the Minutes Between Plans

Baby Panda World Brings Quick Play to Modern Phones, but Its Game Library Feels Busy
ISO is another setting to approach with restraint. In low light, raising sensitivity can help reveal more of a scene, but it can also make image noise more noticeable. For a sign, building, or other subject that will stay still for a moment, a careful exposure adjustment may be a better trade-off than simply chasing brightness. The right choice depends on whether you value visible shadow detail, clean texture, or a quick capture more.
Making photos and video in real conditions
I couldn’t wait to test this out, so I took a walk around the city at night. The results? Well, the difference was like night and day—literally. Normally, my night photos end up looking grainy and washed out, but with this app, they were surprisingly crisp and detailed. The manual controls were a nice touch, letting me tweak the settings to get just the right shot.
Video mode was equally impressive. Capturing video under streetlights, the app managed to balance the brightness and contrast without sacrificing quality. It felt like stepping up my smartphone’s camera game without needing any extra gear.
A realistic use for that combination is an evening walk where the subject changes from a building you can photograph at leisure to a short moment you want to record as it happens. I would use the photo mode for the still scene and switch to video when movement is part of what makes the memory worth keeping. The trade-off is that video is less forgiving of shaky hands and moving subjects: a brighter recording is not automatically a steadier or sharper one.
For a better chance at a clean result, brace the phone against a wall or railing when the subject is stationary, and take more than one frame if the moment allows. In video, move the phone slowly and avoid sweeping across bright lamps too quickly. These are simple habits, but they help separate limitations caused by movement from the app’s low-light processing.
It is also worth thinking about what the photo is for before adjusting the image. A picture meant to remember a night out can be brighter and more forgiving than one intended to preserve the atmosphere of a dim room. If the scene’s darkness is part of the mood, raising exposure aggressively may make it feel unlike the moment you saw. I would use enhancement to recover useful detail, not to erase the character of nighttime.
A straightforward workflow, with realistic limits
Now, a great feature set is only as good as the user experience, and I’m happy to report that this app delivers. Navigation is smooth, and the controls are responsive. There’s no lag, which is crucial when you’re trying to snap that perfect shot in a fleeting moment.
The interface is clean, with a minimalist design that doesn’t overwhelm you with options. It’s all about letting you focus on capturing memories, not fiddling with settings.
For a simple creative workflow, I would decide first whether I need a still or a clip, frame the scene, and make only the adjustments that solve a visible problem. After taking the shot, I would review it at normal size before deciding whether to repeat it. A bright preview can be persuasive on a small screen, while noise, motion blur, or clipped highlights become easier to notice when you look more carefully.
This is a capture tool, so it makes the most sense when you want to create the image at the scene rather than spend time rebuilding it later. If you already prefer taking a photo with your standard camera and editing brightness and contrast afterward, that familiar workflow may suit you better. Editing later can give you more time to compare versions, while adjusting in the camera app is more convenient when you want a usable shot immediately.
Compared with the camera app that comes with a phone, a dedicated night camera is appealing when you want to focus on low-light capture and make manual adjustments directly. The default camera may still be the better choice for everyday snapshots, especially when you are photographing fast movement or want the quickest route from camera to sharing. I would keep both options available rather than assume one must replace the other.
The biggest practical limitation is that camera controls cannot overcome every difficult condition. Very little light, a subject that will not hold still, or a phone that is moving can all work against a clear result. Manual settings also add a decision at the moment of capture, so they may be a distraction when a quick automatic photo matters more than careful control. For an important event, I would take a second shot with the regular camera rather than trust one frame from any single app.
Choosing the right moment to use it
This app is a good fit for people who often take pictures outdoors after dark, want to experiment with exposure and focus, or occasionally need a short night-time video without carrying extra equipment. It can also be useful for someone learning how different camera adjustments affect a scene, since changing a setting and immediately checking the result makes the trade-offs concrete.
I would be less likely to recommend it to someone whose main need is fast action photography, extensive photo editing, or a large set of creative finishing tools. A dedicated editor is a better fit when the goal is to retouch, crop, or prepare a finished image after the shoot. Likewise, if your phone already gives you the low-light result you like through its standard camera, adding another camera app may not improve your routine enough to justify switching.
Before relying on it for a particular outing, try it at home or on a familiar street. Photograph one still subject, try a short video, and check the results outside the camera preview. That small test helps you learn whether its controls suit your phone and whether you prefer the app’s look. It also gives you a chance to find a comfortable way to hold the phone before you are trying to capture a brief moment.
The app has an average rating of 4.5 from around 14 thousand ratings, and it has passed one million installs. It was released on June 21, 2023, and version 1.2.8 is the current version. For me, those figures provide context, but the deciding factor is still whether the results work on your own device and in the kind of darkness you actually encounter.
Where it fits in a creator’s toolkit
Night Camera Mode: Video Photo is best understood as a focused capture option, not an all-purpose photography studio. Its appeal is the chance to make a low-light image or clip with a few direct controls, then move on with the rest of your night. The free price makes it easy to try, while the Everyone content rating makes its intended audience broad; neither changes the basic need to judge the results for yourself.
For sharing, I would choose the image that looks convincing at the size people will actually see it, not merely the one that appears most dramatic in the preview. If the photo is for a quick message, a little grain may matter less than preserving the moment. If it is for a larger display, checking focus and shadow detail first is a better handoff habit. The same applies to video: a short, steady clip is often more useful than a longer recording that is difficult to watch.
Storage and organization are also part of a sensible workflow. After a night shoot, I would review the camera roll and keep the strongest version rather than saving every near-duplicate. That is especially useful when you test different exposure choices, because the variations can be subtle until you compare them side by side. A small amount of selection makes it easier to find the image you actually want to share later.
My verdict for night-time shooting
In conclusion, Night Camera Mode: Video Photo is a game-changer for anyone passionate about photography and videography. It brings out the best in your phone’s camera, especially when the sun goes down. Whether you’re a pro photographer or just someone who loves snapping pictures on the go, this app is worth checking out.
So, if you find yourself frequently frustrated with your night shots, give this app a try. It might just become your new favorite tool for capturing the beauty of the night.
My recommendation is to treat it as a useful extra rather than a guaranteed upgrade for every camera task. It makes the most sense when you can pause, compose, and use its low-light controls with intention; for spontaneous action, your regular camera may be the more dependable choice. If night scenes are a regular part of your photos, a few side-by-side tests will quickly show whether this approach earns a place in your routine.
Pros
- Excellent low-light performance.
- User-friendly interface design.
- Supports multiple camera modes.
- Fast and responsive controls.
- Regular updates enhance features.
Cons
- Consumes battery quickly.
- Limited free features.
- Occasional app crashes.
- Ads in the free version.
- Requires modern hardware.
FAQs for Night Camera Mode: Video Photo
What features does Night Camera Mode: Video Photo offer?
Night Camera Mode: Video Photo provides enhanced low-light photography and videography capabilities. It includes advanced algorithms to brighten dark environments, noise reduction technology for clearer images, and a variety of filters to enhance your photos and videos. Additionally, the app offers manual controls for exposure and focus, allowing users to customize their shooting experience.
Is Night Camera Mode: Video Photo easy to use for beginners?
Yes, the app is designed with an intuitive interface that makes it accessible to both beginners and experienced photographers. It includes user-friendly tutorials and tips to guide new users through its features. The straightforward navigation and simple controls ensure that anyone can quickly learn to capture great images in low-light conditions.
Does the app support video recording in night mode?
Absolutely. Night Camera Mode: Video Photo not only enhances photo quality in low-light environments but also supports high-quality video recording. The app uses advanced technology to adjust lighting and reduce noise, ensuring that your videos are clear and vibrant even when filmed in the dark. Users can also apply filters and effects in real-time.
Is Night Camera Mode: Video Photo available for both Android and iOS devices?
Yes, the app is available for download on both Android and iOS platforms. It is optimized to work seamlessly across a range of devices, ensuring that users on different operating systems can enjoy its features. Links to download the app from Google Play and the Apple App Store can be found on our website.
Are there any in-app purchases or subscriptions required?
While Night Camera Mode: Video Photo offers a range of free features, there are additional premium options available through in-app purchases. These may include advanced filters, additional editing tools, and ad-free usage. Users can choose to subscribe for a more enhanced experience, but the basic features are fully functional without any cost.


